[深度学习] PyTorch 实现双向LSTM 情感分析-程序员宅基地
技术标签: lstm NLP nlp 深度学习 pytorch
一 前言
情感分析(Sentiment Analysis),也称为情感分类,属于自然语言处理(Natural Language Processing,NLP)领域的一个分支任务,随着互联网的发展而兴起。多数情况下该任务分析一个文本所呈现的信息是正面、负面或者中性,也有一些研究会区分得更细,例如在正负极性中再进行分级,区分不同情感强度.
文本情感分析(Sentiment Analysis)是自然语言处理(NLP)方法中常见的应用,也是一个有趣的基本任务,尤其是以提炼文本情绪内容为目的的分类。它是对带有情感色彩的主观性文本进行分析、处理、归纳和推理的过程。
情感分析中的情感极性(倾向)分析。所谓情感极性分析,指的是对文本进行褒义、贬义、中性的判断。在大多应用场景下,只分为两类。例如对于“喜爱”和“厌恶”这两个词,就属于不同的情感倾向。
本文将采用LSTM模型,训练一个能够识别文本postive, negative情感的分类器。
RNN网络因为使用了单词的序列信息,所以准确率要比前向传递神经网络要高。
网络结构:

首先,将单词传入 embedding层,之所以使用嵌入层,是因为单词数量太多,使用嵌入式词向量来表示单词更有效率。在这里我们使用word2vec方式来实现,而且特别神奇的是,我们只需要加入嵌入层即可,网络会自主学习嵌入矩阵
参考下图

通过embedding 层, 新的单词表示传入 LSTM cells。这将是一个递归链接网络,所以单词的序列信息会在网络之间传递。最后, LSTM cells连接一个sigmoid output layer 。 使用sigmoid可以预测该文本是 积极的 还是 消极的 情感。输出层只有一个单元节点(使用sigmoid激活)。
只需要关注最后一个sigmoid的输出,损失只计算最后一步的输出和标签的差异。
文件说明:
(1)reviews.txt 是原始文本文件,共25000条,一行是一篇英文电影影评文本
(2)labels.txt 是标签文件,共25000条,一行是一个标签,positive 或者 negative
二 模型训练与预测
1、Data Preprocessing
建任何模型的第一步,永远是数据清洗。 因为使用embedding 层,需要将单词编码成整数。
我们要去除标点符号。 同时,去除不同文本之间有分隔符号 \n,我们先把\n当成分隔符号,分割所有评论。 然后在将所有评论再次连接成为一个大的文本。
import numpy as np

# read data from text files
with open('./data/reviews.txt', 'r') as f:
    reviews = f.read()
with open('./data/labels.txt', 'r') as f:
    labels = f.read()

print(reviews[:1000])
print()
print(labels[:20])
from string import punctuation

# get rid of punctuation
reviews = reviews.lower() # lowercase, standardize
all_text = ''.join([c for c in reviews if c not in punctuation])

# split by new lines and spaces
reviews_split = all_text.split('\n')
all_text = ' '.join(reviews_split)

# create a list of words
words = all_text.split()

2、Encoding the words
embedding lookup要求输入的网络数据是整数。最简单的方法就是创建数据字典:{单词:整数}。然后将评论全部一一对应转换成整数,传入网络。
# feel free to use this import
from collections import Counter

## Build a dictionary that maps words to integers
counts = Counter(words)
vocab = sorted(counts, key=counts.get, reverse=True)
vocab_to_int = {word: ii for ii, word in enumerate(vocab, 1)}

## use the dict to tokenize each review in reviews_split
## store the tokenized reviews in reviews_ints
reviews_ints = []
for review in reviews_split:
    reviews_ints.append([vocab_to_int[word] for word in review.split()])


# stats about vocabulary
print('Unique words: ', len((vocab_to_int)))  # should ~ 74000+
print()

# print tokens in first review
print('Tokenized review: \n', reviews_ints[:1])
补充enumerate函数用法:
在enumerate函数内写上int整型数字,则以该整型数字作为起始去迭代生成结果。
3、Encoding the labels
将标签 “positive” or "negative"转换为数值。
# 1=positive, 0=negative label conversion
labels_split = labels.split('\n')
encoded_labels = np.array([1 if label == 'positive' else 0 for label in labels_split])

# outlier review stats
review_lens = Counter([len(x) for x in reviews_ints])
print("Zero-length reviews: {}".format(review_lens[0]))
print("Maximum review length: {}".format(max(review_lens)))
消除长度为0的行
print('Number of reviews before removing outliers: ', len(reviews_ints))

## remove any reviews/labels with zero length from the reviews_ints list.

# get indices of any reviews with length 0
non_zero_idx = [ii for ii, review in enumerate(reviews_ints) if len(review) != 0]

# remove 0-length reviews and their labels
reviews_ints = [reviews_ints[ii] for ii in non_zero_idx]
encoded_labels = np.array([encoded_labels[ii] for ii in non_zero_idx])

print('Number of reviews after removing outliers: ', len(reviews_ints))![]()
4、Padding sequences
将所以句子统一长度为200个单词:
1、评论长度小于200的,我们对其左边填充0
2、对于大于200的,我们只截取其前200个单词

#选择每个句子长为200
seq_len = 200
from tensorflow.contrib.keras import preprocessing
features = np.zeros((len(reviews_ints),seq_len),dtype=int)
#将reviews_ints值逐行 赋值给features
features = preprocessing.sequence.pad_sequences(reviews_ints,200)
features.shape
或者
def pad_features(reviews_ints, seq_length):
    ''' Return features of review_ints, where each review is padded with 0's
        or truncated to the input seq_length.
    '''

    # getting the correct rows x cols shape
    features = np.zeros((len(reviews_ints), seq_length), dtype=int)

    # for each review, I grab that review and
    for i, row in enumerate(reviews_ints):
        features[i, -len(row):] = np.array(row)[:seq_length]

    return features


# Test your implementation!

seq_length = 200

features = pad_features(reviews_ints, seq_length=seq_length)

## test statements - do not change - ##
assert len(features)==len(reviews_ints), "Your features should have as many rows as reviews."
assert len(features[0])==seq_length, "Each feature row should contain seq_length values."

# print first 10 values of the first 30 batches
print(features[:30,:10])
5、Training, Test划分
split_frac = 0.8
## split data into training, validation, and test data (features and labels, x and y)
split_idx = int(len(features)*split_frac)
train_x, remaining_x = features[:split_idx], features[split_idx:]
train_y, remaining_y = encoded_labels[:split_idx], encoded_labels[split_idx:]
test_idx = int(len(remaining_x)*0.5)
val_x, test_x = remaining_x[:test_idx], remaining_x[test_idx:]
val_y, test_y = remaining_y[:test_idx], remaining_y[test_idx:]
## print out the shapes of your resultant feature data
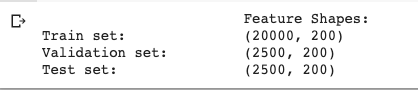
print("\t\t\tFeature Shapes:")
print("Train set: \t\t{}".format(train_x.shape),
"\nValidation set: \t{}".format(val_x.shape),
"\nTest set: \t\t{}".format(test_x.shape))或
from sklearn.model_selection import ShuffleSplit
ss = ShuffleSplit(n_splits=1,test_size=0.2,random_state=0)
for train_index,test_index in ss.split(np.array(reviews_ints)):
    train_x = features[train_index]
    train_y = labels[train_index]
    test_x = features[test_index]
    test_y = labels[test_index]

print("\t\t\tFeature Shapes:")
print("Train set: \t\t{}".format(train_x.shape),
      "\nTrain_Y set: \t{}".format(train_y.shape),
      "\nTest set: \t\t{}".format(test_x.shape))
6. DataLoaders and Batching
import torch
from torch.utils.data import TensorDataset, DataLoader

# create Tensor datasets
train_data = TensorDataset(torch.from_numpy(train_x), torch.from_numpy(train_y))
valid_data = TensorDataset(torch.from_numpy(val_x), torch.from_numpy(val_y))
test_data = TensorDataset(torch.from_numpy(test_x), torch.from_numpy(test_y))

# dataloaders
batch_size = 50

# make sure the SHUFFLE your training data
train_loader = DataLoader(train_data, shuffle=True, batch_size=batch_size)
valid_loader = DataLoader(valid_data, shuffle=True, batch_size=batch_size)
test_loader = DataLoader(test_data, shuffle=True, batch_size=batch_size)
# obtain one batch of training data
dataiter = iter(train_loader)
sample_x, sample_y = dataiter.next()

print('Sample input size: ', sample_x.size()) # batch_size, seq_length
print('Sample input: \n', sample_x)
print()
print('Sample label size: ', sample_y.size()) # batch_size
print('Sample label: \n', sample_y)
7. 双向LSTM模型
1. 判断是否有GPU
# First checking if GPU is available
train_on_gpu=torch.cuda.is_available()

if(train_on_gpu):
    print('Training on GPU.')
else:
    print('No GPU available, training on CPU.')
import torch.nn as nn
class SentimentRNN(nn.Module):
"""
The RNN model that will be used to perform Sentiment analysis.
"""
def __init__(self, vocab_size, output_size, embedding_dim, hidden_dim, n_layers, bidirectional=True, drop_prob=0.5):
"""
Initialize the model by setting up the layers.
"""
super(SentimentRNN, self).__init__()
self.output_size = output_size
self.n_layers = n_layers
self.hidden_dim = hidden_dim
self.bidirectional = bidirectional
# embedding and LSTM layers
self.embedding = nn.Embedding(vocab_size, embedding_dim)
self.lstm = nn.LSTM(embedding_dim, hidden_dim, n_layers,
dropout=drop_prob, batch_first=True,
bidirectional=bidirectional)
# dropout layer
self.dropout = nn.Dropout(0.3)
# linear and sigmoid layers
if bidirectional:
self.fc = nn.Linear(hidden_dim*2, output_size)
else:
self.fc = nn.Linear(hidden_dim, output_size)
self.sig = nn.Sigmoid()
def forward(self, x, hidden):
"""
Perform a forward pass of our model on some input and hidden state.
"""
batch_size = x.size(0)
# embeddings and lstm_out
x = x.long()
embeds = self.embedding(x)
lstm_out, hidden = self.lstm(embeds, hidden)
# if bidirectional:
# lstm_out = lstm_out.contiguous().view(-1, self.hidden_dim*2)
# else:
# lstm_out = lstm_out.contiguous().view(-1, self.hidden_dim)
# dropout and fully-connected layer
out = self.dropout(lstm_out)
out = self.fc(out)
# sigmoid function
sig_out = self.sig(out)
# reshape to be batch_size first
sig_out = sig_out.view(batch_size, -1)
sig_out = sig_out[:, -1] # get last batch of labels
# return last sigmoid output and hidden state
return sig_out, hidden
def init_hidden(self, batch_size):
''' Initializes hidden state '''
# Create two new tensors with sizes n_layers x batch_size x hidden_dim,
# initialized to zero, for hidden state and cell state of LSTM
weight = next(self.parameters()).data
number = 1
if self.bidirectional:
number = 2
if (train_on_gpu):
hidden = (weight.new(self.n_layers*number, batch_size, self.hidden_dim).zero_().cuda(),
weight.new(self.n_layers*number, batch_size, self.hidden_dim).zero_().cuda()
)
else:
hidden = (weight.new(self.n_layers*number, batch_size, self.hidden_dim).zero_(),
weight.new(self.n_layers*number, batch_size, self.hidden_dim).zero_()
)
return hidden是否使用双向LSTM(在测试集上效果更好一些)
# Instantiate the model w/ hyperparams
vocab_size = len(vocab_to_int)+1 # +1 for the 0 padding + our word tokens
output_size = 1
embedding_dim = 400
hidden_dim = 256
n_layers = 2
bidirectional = False  #这里为True,为双向LSTM

net = SentimentRNN(vocab_size, output_size, embedding_dim, hidden_dim, n_layers, bidirectional)

print(net)
8 Train
# loss and optimization functions
lr=0.001

criterion = nn.BCELoss()
optimizer = torch.optim.Adam(net.parameters(), lr=lr)


# training params

epochs = 4 # 3-4 is approx where I noticed the validation loss stop decreasing

print_every = 100
clip=5 # gradient clipping

# move model to GPU, if available
if(train_on_gpu):
    net.cuda()

net.train()
# train for some number of epochs
for e in range(epochs):
    # initialize hidden state
    h = net.init_hidden(batch_size)
    counter = 0

    # batch loop
    for inputs, labels in train_loader:
        counter += 1

        if(train_on_gpu):
            inputs, labels = inputs.cuda(), labels.cuda()

        # Creating new variables for the hidden state, otherwise
        # we'd backprop through the entire training history
        h = tuple([each.data for each in h])
        # zero accumulated gradients
        net.zero_grad()

        # get the output from the model
        output, h = net(inputs, h)

        # calculate the loss and perform backprop
        loss = criterion(output.squeeze(), labels.float())
        loss.backward()
        # `clip_grad_norm` helps prevent the exploding gradient problem in RNNs / LSTMs.
        nn.utils.clip_grad_norm_(net.parameters(), clip)
        optimizer.step()

        # loss stats
        if counter % print_every == 0:
            # Get validation loss
            val_h = net.init_hidden(batch_size)
            val_losses = []
            net.eval()
            for inputs, labels in valid_loader:

                # Creating new variables for the hidden state, otherwise
                # we'd backprop through the entire training history
                val_h = tuple([each.data for each in val_h])

                if(train_on_gpu):
                    inputs, labels = inputs.cuda(), labels.cuda()

                output, val_h = net(inputs, val_h)
                val_loss = criterion(output.squeeze(), labels.float())

                val_losses.append(val_loss.item())

            net.train()
            print("Epoch: {}/{}...".format(e+1, epochs),
                  "Step: {}...".format(counter),
                  "Loss: {:.6f}...".format(loss.item()),
                  "Val Loss: {:.6f}".format(np.mean(val_losses)))

9 Test
# Get test data loss and accuracy

test_losses = [] # track loss
num_correct = 0

# init hidden state
h = net.init_hidden(batch_size)

net.eval()
# iterate over test data
for inputs, labels in test_loader:

    # Creating new variables for the hidden state, otherwise
    # we'd backprop through the entire training history
    h = tuple([each.data for each in h])

    if(train_on_gpu):
        inputs, labels = inputs.cuda(), labels.cuda()

    # get predicted outputs
    output, h = net(inputs, h)

    # calculate loss
    test_loss = criterion(output.squeeze(), labels.float())
    test_losses.append(test_loss.item())

    # convert output probabilities to predicted class (0 or 1)
    pred = torch.round(output.squeeze())  # rounds to the nearest integer

    # compare predictions to true label
    correct_tensor = pred.eq(labels.float().view_as(pred))
    correct = np.squeeze(correct_tensor.numpy()) if not train_on_gpu else np.squeeze(correct_tensor.cpu().numpy())
    num_correct += np.sum(correct)


# -- stats! -- ##
# avg test loss
print("Test loss: {:.3f}".format(np.mean(test_losses)))

# accuracy over all test data
test_acc = num_correct/len(test_loader.dataset)
print("Test accuracy: {:.3f}".format(test_acc))
三. 模型Inference
# negative test review
test_review_neg = 'The worst movie I have seen; acting was terrible and I want my money back. This movie had bad acting and the dialogue was slow.'
from string import punctuation

def tokenize_review(test_review):
    test_review = test_review.lower() # lowercase
    # get rid of punctuation
    test_text = ''.join([c for c in test_review if c not in punctuation])

    # splitting by spaces
    test_words = test_text.split()

    # tokens
    test_ints = []
    test_ints.append([vocab_to_int[word] for word in test_words])

    return test_ints

# test code and generate tokenized review
test_ints = tokenize_review(test_review_neg)
print(test_ints)


# test sequence padding
seq_length=200
features = pad_features(test_ints, seq_length)
print(features)

# test conversion to tensor and pass into your model
feature_tensor = torch.from_numpy(features)
print(feature_tensor.size())![]()

![]()
def predict(net, test_review, sequence_length=200):

    net.eval()

    # tokenize review
    test_ints = tokenize_review(test_review)

    # pad tokenized sequence
    seq_length=sequence_length
    features = pad_features(test_ints, seq_length)

    # convert to tensor to pass into your model
    feature_tensor = torch.from_numpy(features)

    batch_size = feature_tensor.size(0)

    # initialize hidden state
    h = net.init_hidden(batch_size)

    if(train_on_gpu):
        feature_tensor = feature_tensor.cuda()

    # get the output from the model
    output, h = net(feature_tensor, h)

    # convert output probabilities to predicted class (0 or 1)
    pred = torch.round(output.squeeze())
    # printing output value, before rounding
    print('Prediction value, pre-rounding: {:.6f}'.format(output.item()))

    # print custom response
    if(pred.item()==1):
        print("Positive review detected!")
    else:
        print("Negative review detected.")
# positive test review
test_review_pos = 'This movie had the best acting and the dialogue was so good. I loved it.'

# call function
seq_length=200 # good to use the length that was trained on

predict(net, test_review_neg, seq_length)
智能推荐
while循环&CPU占用率高问题深入分析与解决方案_main函数使用while(1)循环cpu占用99-程序员宅基地
文章浏览阅读3.8k次,点赞9次,收藏28次。直接上一个工作中碰到的问题,另外一个系统开启多线程调用我这边的接口,然后我这边会开启多线程批量查询第三方接口并且返回给调用方。使用的是两三年前别人遗留下来的方法,放到线上后发现确实是可以正常取到结果,但是一旦调用,CPU占用就直接100%(部署环境是win server服务器)。因此查看了下相关的老代码并使用JProfiler查看发现是在某个while循环的时候有问题。具体项目代码就不贴了,类似于下面这段代码。while(flag) {//your code;}这里的flag._main函数使用while(1)循环cpu占用99
【无标题】jetbrains idea shift f6不生效_idea shift +f6快捷键不生效-程序员宅基地
文章浏览阅读347次。idea shift f6 快捷键无效_idea shift +f6快捷键不生效
node.js学习笔记之Node中的核心模块_node模块中有很多核心模块,以下不属于核心模块,使用时需下载的是-程序员宅基地
文章浏览阅读135次。Ecmacript 中没有DOM 和 BOM核心模块Node为JavaScript提供了很多服务器级别,这些API绝大多数都被包装到了一个具名和核心模块中了,例如文件操作的 fs 核心模块 ,http服务构建的http 模块 path 路径操作模块 os 操作系统信息模块// 用来获取机器信息的var os = require('os')// 用来操作路径的var path = require('path')// 获取当前机器的 CPU 信息console.log(os.cpus._node模块中有很多核心模块,以下不属于核心模块,使用时需下载的是
数学建模【SPSS 下载-安装、方差分析与回归分析的SPSS实现(软件概述、方差分析、回归分析)】_化工数学模型数据回归软件-程序员宅基地
文章浏览阅读10w+次,点赞435次,收藏3.4k次。SPSS 22 下载安装过程7.6 方差分析与回归分析的SPSS实现7.6.1 SPSS软件概述1 SPSS版本与安装2 SPSS界面3 SPSS特点4 SPSS数据7.6.2 SPSS与方差分析1 单因素方差分析2 双因素方差分析7.6.3 SPSS与回归分析SPSS回归分析过程牙膏价格问题的回归分析_化工数学模型数据回归软件
利用hutool实现邮件发送功能_hutool发送邮件-程序员宅基地
文章浏览阅读7.5k次。如何利用hutool工具包实现邮件发送功能呢?1、首先引入hutool依赖<dependency> <groupId>cn.hutool</groupId> <artifactId>hutool-all</artifactId> <version>5.7.19</version></dependency>2、编写邮件发送工具类package com.pc.c..._hutool发送邮件
docker安装elasticsearch,elasticsearch-head,kibana,ik分词器_docker安装kibana连接elasticsearch并且elasticsearch有密码-程序员宅基地
文章浏览阅读867次,点赞2次,收藏2次。docker安装elasticsearch,elasticsearch-head,kibana,ik分词器安装方式基本有两种,一种是pull的方式,一种是Dockerfile的方式,由于pull的方式pull下来后还需配置许多东西且不便于复用,个人比较喜欢使用Dockerfile的方式所有docker支持的镜像基本都在https://hub.docker.com/docker的官网上能找到合..._docker安装kibana连接elasticsearch并且elasticsearch有密码
随便推点
Python 攻克移动开发失败!_beeware-程序员宅基地
文章浏览阅读1.3w次,点赞57次,收藏92次。整理 | 郑丽媛出品 | CSDN(ID:CSDNnews)近年来,随着机器学习的兴起,有一门编程语言逐渐变得火热——Python。得益于其针对机器学习提供了大量开源框架和第三方模块,内置..._beeware
Swift4.0_Timer 的基本使用_swift timer 暂停-程序员宅基地
文章浏览阅读7.9k次。//// ViewController.swift// Day_10_Timer//// Created by dongqiangfei on 2018/10/15.// Copyright 2018年 飞飞. All rights reserved.//import UIKitclass ViewController: UIViewController { ..._swift timer 暂停
元素三大等待-程序员宅基地
文章浏览阅读986次,点赞2次,收藏2次。1.硬性等待让当前线程暂停执行,应用场景:代码执行速度太快了,但是UI元素没有立马加载出来,造成两者不同步,这时候就可以让代码等待一下,再去执行找元素的动作线程休眠,强制等待 Thread.sleep(long mills)package com.example.demo;import org.junit.jupiter.api.Test;import org.openqa.selenium.By;import org.openqa.selenium.firefox.Firefox.._元素三大等待
Java软件工程师职位分析_java岗位分析-程序员宅基地
文章浏览阅读3k次,点赞4次,收藏14次。Java软件工程师职位分析_java岗位分析
Java:Unreachable code的解决方法_java unreachable code-程序员宅基地
文章浏览阅读2k次。Java:Unreachable code的解决方法_java unreachable code
标签data-*自定义属性值和根据data属性值查找对应标签_如何根据data-*属性获取对应的标签对象-程序员宅基地
文章浏览阅读1w次。1、html中设置标签data-*的值 标题 11111 222222、点击获取当前标签的data-url的值$('dd').on('click', function() { var urlVal = $(this).data('ur_如何根据data-*属性获取对应的标签对象